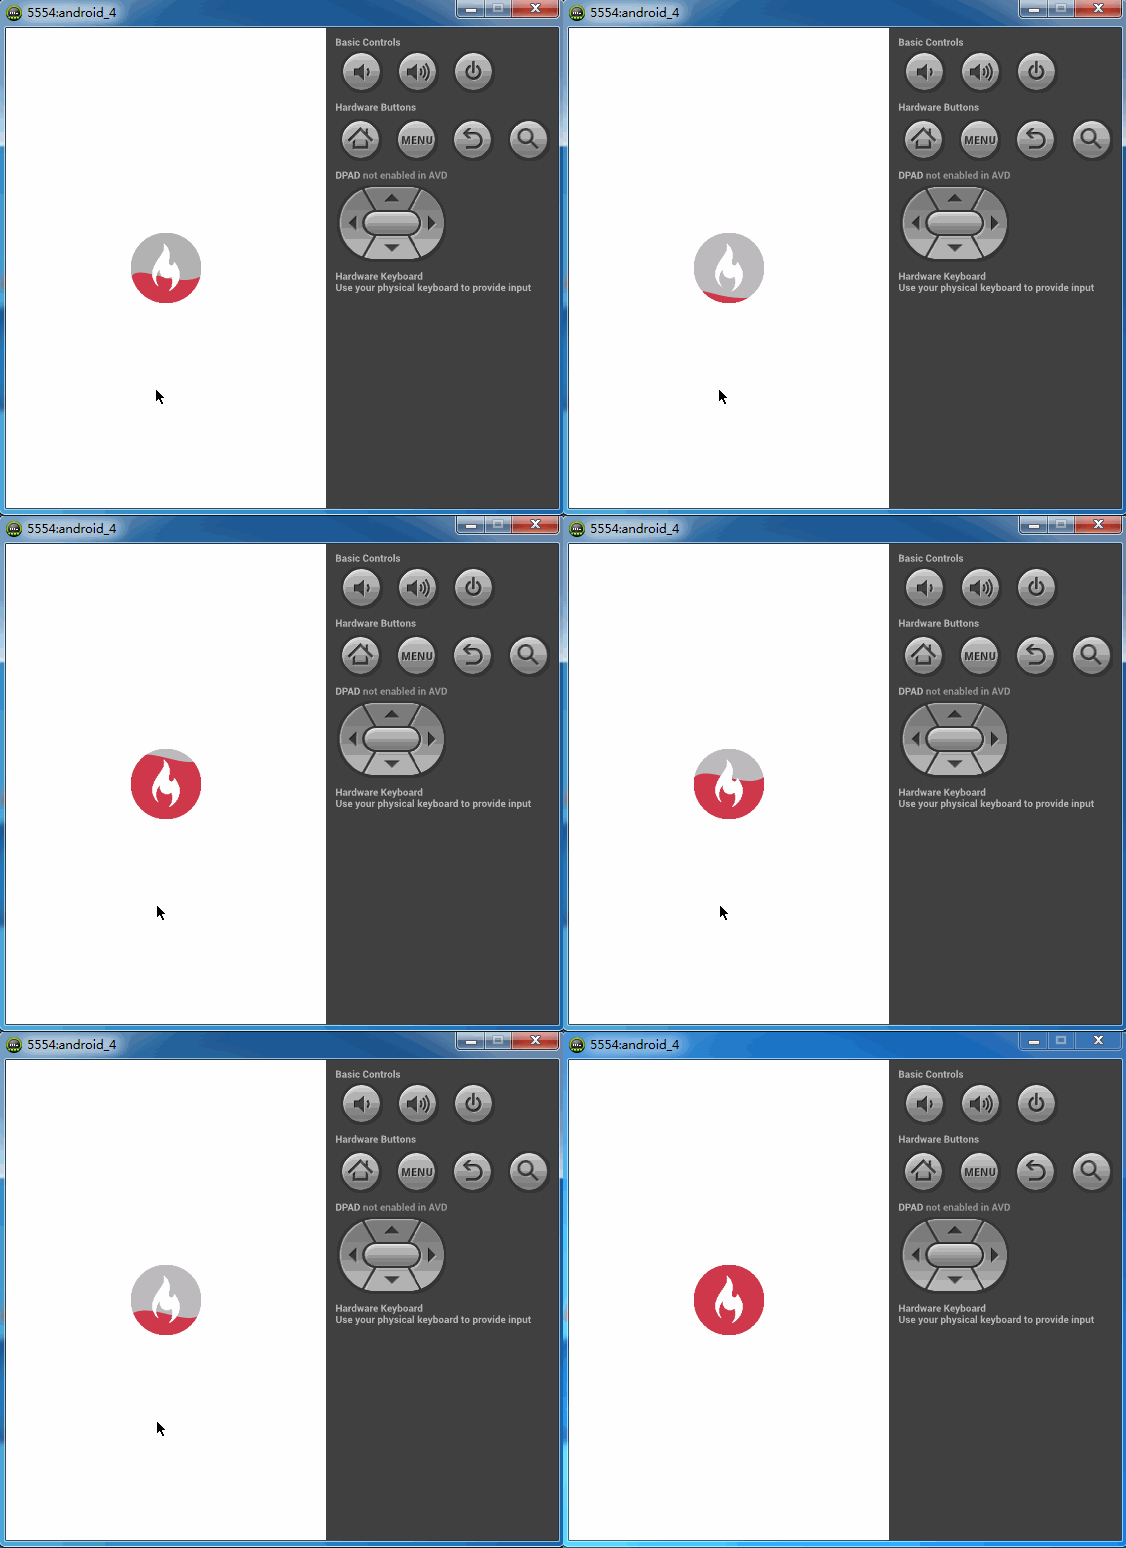
慕课网app下拉刷新图标填充效果的实现
来源:程序员人生 发布时间:2015-04-01 08:17:50 阅读次数:3382次
之前看到1种下拉刷新的效果,与以往的下拉效果都不1样,大多数下拉刷新都是1个圆形进度条在旋转,而这个下拉刷新则是1个不断填充的效果。本以为这是个自定义View,后来反编译慕课网的app后提取资源的时候看到好多的图片,那大概慕课网app内部的实现应当是帧动画到达这类效果。而当我看到这类效果的时候,由于前段时间在学自定义控件,所以本能的反应则是自定义的。首先我们看下慕课网的效果。以下图

而我的也实现了1个这个图标填充的简单版。以下图

全部实现使用图形的混合模式+贝塞尔曲线,贝塞尔曲线的绘制参考自爱哥的博客 贝塞尔曲线内容
资源文件就只有下面这个图标,该图标提取自慕课网app,然后对内部的火焰进行透明处理过

既然是自定义View,那就要继承View,实现onDraw,onMeasure等方法,为了简单起见,这里将控件的宽度高度直接设置为图片的宽度和高度,而没有去实现相应的逻辑去判断MeasureSpec的模式是哪一个从而进行处理。
先贴代码
package cn.edu.zafu.view;
import android.content.Context;
import android.graphics.Bitmap;
import android.graphics.Bitmap.Config;
import android.graphics.BitmapFactory;
import android.graphics.Canvas;
import android.graphics.Color;
import android.graphics.Paint;
import android.graphics.Path;
import android.graphics.PorterDuff;
import android.graphics.PorterDuffXfermode;
import android.util.AttributeSet;
import android.view.View;
/**
* @author lizhangqu
*
* 2015⑶⑸
*/
public class CustomView extends View {
private PorterDuffXfermode porterDuffXfermode;// Xfermode
private Paint paint;// 画笔
private Bitmap bitmap;// 源图片
private int width, height;// 控件宽高
private Path path;// 画贝塞尔曲线需要用到
private Canvas mCanvas;// 在该画布上绘制目标图片
private Bitmap bg;// 目标图片
private float controlX, controlY;// 贝塞尔曲线控制点,使用3阶贝塞尔曲线曲线,需要两个控制点,两个控制点都在该变量基础上生成
private float waveY;// 上升的高度
private boolean isIncrease;// 用于控制控制点水平移动
private boolean isReflesh = true;// 是不是刷新并产生填充效果,默许为true
/**
* @return 是不是刷新
*/
public boolean isReflesh() {
return isReflesh;
}
/**
* 提供接口设置刷新
*
* @param isReflesh
*/
public void setReflesh(boolean isReflesh) {
this.isReflesh = isReflesh;
}
/**
* @param context
*/
public CustomView(Context context) {
this(context, null);
}
/**
* @param context
* @param attrs
*/
public CustomView(Context context, AttributeSet attrs) {
this(context, attrs, 0);
}
/**
* @param context
* @param attrs
* @param defStyle
*/
public CustomView(Context context, AttributeSet attrs, int defStyle) {
super(context, attrs, defStyle);
init();
}
/**
* 初始化变量
*/
private void init() {
// 初始化画笔
paint = new Paint();
paint.setAntiAlias(true);
paint.setDither(true);
paint.setStyle(Paint.Style.FILL);
paint.setColor(Color.parseColor("#ffc9394a"));
// 取得资源文件
bitmap = BitmapFactory.decodeResource(getResources(), R.drawable.mooc);
// 设置宽高为图片的宽高
width = bitmap.getWidth();
height = bitmap.getHeight();
// 初始状态值
waveY = 7 / 8F * height;
controlY = 17 / 16F * height;
// 初始化Xfermode
porterDuffXfermode = new PorterDuffXfermode(PorterDuff.Mode.SRC_IN);
// 初始化path
path = new Path();
// 初始化画布
mCanvas = new Canvas();
// 创建bitmap
bg = Bitmap.createBitmap(width, height, Config.ARGB_8888);
// 将新建的bitmap注入画布
mCanvas.setBitmap(bg);
}
@Override
protected void onDraw(Canvas canvas) {
// 画目标图,存在bg上
drawTargetBitmap();
// 将目标图绘制在当前画布上,出发点为左侧距,上边距的交点
canvas.drawBitmap(bg, getPaddingLeft(), getPaddingTop(), null);
if (isReflesh) {
// 重绘,使用boolean变量isReflesh进行控制,并对外提供访问的接口,默许为true且刷新
invalidate();
}
}
private void drawTargetBitmap() {
// 重置path
path.reset();
// 擦除像素
bg.eraseColor(Color.parseColor("#00ffffff"));
// 当控制点的x坐标大于或等于终点x坐标时更改标识值
if (controlX >= width + 1 / 2 * width) {
isIncrease = false;
}
// 当控制点的x坐标小于或等于出发点x坐标时更改标识值
else if (controlX <= ⑴ / 2 * width) {
isIncrease = true;
}
// 根据标识值判断当前的控制点x坐标是该加还是减
controlX = isIncrease ? controlX + 10 : controlX - 10;
if (controlY >= 0) {
// 波浪上移
controlY -= 1;
waveY -= 1;
} else {
// 超越则重置位置
waveY = 7 / 8F * height;
controlY = 17 / 16F * height;
}
// 贝塞尔曲线的生成
path.moveTo(0, waveY);
// 两个控制点通过controlX,controlY生成
path.cubicTo(controlX / 2, waveY - (controlY - waveY),
(controlX + width) / 2, controlY, width, waveY);
// 与下下边界闭合
path.lineTo(width, height);
path.lineTo(0, height);
// 进行闭合
path.close();
// 以上画贝塞尔曲线代码参考自爱哥博客
// http://blog.csdn.net/aigestudio/article/details/41960507
mCanvas.drawBitmap(bitmap, 0, 0, paint);// 画慕课网logo
paint.setXfermode(porterDuffXfermode);// 设置Xfermode
mCanvas.drawPath(path, paint);// 画3阶贝塞尔曲线
paint.setXfermode(null);// 重置Xfermode
}
@Override
protected void onMeasure(int widthMeasureSpec, int heightMeasureSpec) {
// 取得宽高丈量模式和大小
int widthMode = MeasureSpec.getMode(widthMeasureSpec);
int widthSize = MeasureSpec.getSize(widthMeasureSpec);
int heightMode = MeasureSpec.getMode(heightMeasureSpec);
int heightSize = MeasureSpec.getSize(heightMeasureSpec);
// 保存丈量结果
int width, height;
if (widthMode == MeasureSpec.EXACTLY) {
// 宽度加左右内边距
width = widthSize + getPaddingLeft() + getPaddingRight();
} else {
// 宽度加左右内边距
width = this.width + getPaddingLeft() + getPaddingRight();
;
if (widthMode == MeasureSpec.AT_MOST) {
// 取小的那个
width = Math.min(width, widthSize);
}
}
if (heightMode == MeasureSpec.EXACTLY) {
// 高度加左右内边距
height = heightSize + getPaddingTop() + getPaddingBottom();
} else {
// 高度加左右内边距
height = this.height + getPaddingTop() + getPaddingBottom();
;
if (heightMode == MeasureSpec.AT_MOST) {
// 取小的那个
height = Math.min(height, heightSize);
}
}
// 设置高度宽度为logo宽度和高度,实际开发中应当判断MeasureSpec的模式,进行对应的逻辑处理,这里做了简单的判断丈量
setMeasuredDimension(width, height);
}
}
控件的使用
<RelativeLayout xmlns:android="http://schemas.android.com/apk/res/android"
android:id="@+id/ll"
android:layout_width="match_parent"
android:layout_height="match_parent"
android:orientation="vertical" >
<cn.edu.zafu.view.CustomView
android:id="@+id/cv"
android:layout_width="wrap_content"
android:layout_height="wrap_content"
android:padding="20dp"
android:layout_centerInParent="true"
android:background="#0000ff"
/>
</RelativeLayout>
如果要停止其不断填充的效果,通过函数setReflesh设置isReflesh变量为false便可。
全部实现进程还是相对简单的,基本上注释都讲的很清楚了,这里也不再重复了,文章中触及到的两个知识点(图形的混合模式和贝塞尔曲线)的相干内容参考下面两篇文章
图形混合模式 http://blog.csdn.net/aigestudio/article/details/41316141
贝塞尔曲线 http://blog.csdn.net/aigestudio/article/details/41960507
都是爱哥的文章,个人觉得写得很细。
生活不易,码农辛苦
如果您觉得本网站对您的学习有所帮助,可以手机扫描二维码进行捐赠


