opencv 学习之 车牌提取
来源:程序员人生 发布时间:2015-03-31 07:57:53 阅读次数:4888次
车牌辨认分两步,1是车牌提取,而是字符辨认。
下面是车牌提取。
VS2010。
OpenCV249。
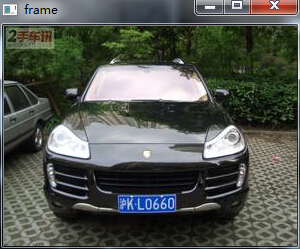
//载入图象
char * path = "d:picture�6.jpg";
IplImage * frame = cvLoadImage(path);
if(!frame) return 0;
cvNamedWindow("frame", 1);
cvShowImage("frame", frame);
//均值滤波
cvSmooth(frame, frame, CV_MEDIAN);
//cvSmooth(frame, frame, CV_GAUSSIAN, 3, 3);
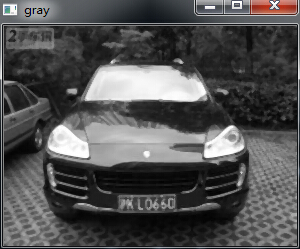
//灰度图
IplImage * gray = cvCreateImage(cvGetSize(frame), frame->depth, 1);
cvCvtColor(frame, gray, CV_BGR2GRAY);
cvNamedWindow("gray", 1);
cvShowImage("gray", gray);
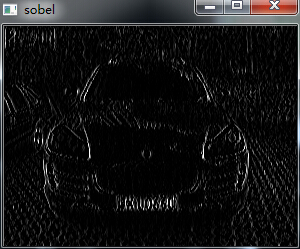
//边沿检测
IplImage * temp = cvCreateImage(cvGetSize(gray), IPL_DEPTH_16S,1);
//x方向梯度,垂直边沿
cvSobel(gray, temp, 2, 0, 3);
IplImage * sobel = cvCreateImage(cvGetSize(temp), IPL_DEPTH_8U,1);
cvConvertScale(temp, sobel, 1, 0);
cvNamedWindow("sobel", 1);
cvShowImage("sobel", sobel);
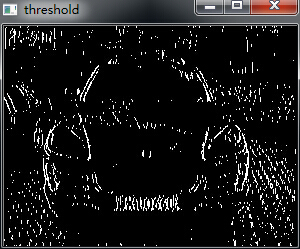
//2值化
IplImage * threshold = cvCreateImage(cvGetSize(sobel), gray->depth, 1);
cvThreshold(sobel, threshold, 0, 255, CV_THRESH_BINARY|CV_THRESH_OTSU);
cvNamedWindow("threshold", 1);
cvShowImage("threshold", threshold);
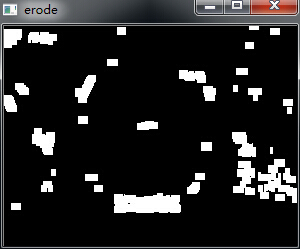
//形态学变化
IplConvKernel * kernal;
IplImage * morph = cvCreateImage(cvGetSize(threshold), threshold->depth, 1);
//自定义 1x3 的核进行 x 方向的膨胀腐蚀
kernal = cvCreateStructuringElementEx(3, 1, 1, 0, CV_SHAPE_RECT);
cvDilate(threshold, morph, kernal, 2); //x 膨胀联通数字
cvErode(morph, morph, kernal, 4); //x 腐蚀去除碎片
cvDilate(morph, morph, kernal, 4); //x 膨胀回复形态
//自定义 3x1 的核进行 y 方向的膨胀腐蚀
kernal = cvCreateStructuringElementEx(1, 3, 0, 1, CV_SHAPE_RECT);
cvErode(morph, morph, kernal, 1); //y 腐蚀去除碎片
cvDilate(morph, morph, kernal, 3); //y 膨胀回复形态
cvNamedWindow("erode", 1);
cvShowImage("erode", morph);
//轮廓检测
IplImage * frame_draw = cvCreateImage(cvGetSize(frame), frame->depth, frame->nChannels);
cvCopy(frame, frame_draw);
CvMemStorage * storage = cvCreateMemStorage(0);
CvSeq * contour = 0;
int count = cvFindContours(morph, storage, &contour, sizeof(CvContour), CV_RETR_CCOMP, CV_CHAIN_APPROX_SIMPLE );
CvSeq * _contour = contour;
for( ; contour != 0; contour = contour->h_next )
{
double tmparea = fabs(cvContourArea(contour));
CvRect aRect = cvBoundingRect( contour, 0 );
if(tmparea > ((frame->height*frame->width)/10))
{
cvSeqRemove(contour,0); //删除面积小于设定值的轮廓,1/10
continue;
}
if (aRect.width < (aRect.height*2))
{
cvSeqRemove(contour,0); //删除宽高比例小于设定值的轮廓
continue;
}
if ((aRect.width/aRect.height) > 4 )
{
cvSeqRemove(contour,0); //删除宽高比例小于设定值的轮廓
continue;
}
if((aRect.height * aRect.width) < ((frame->height * frame->width)/100))
{
cvSeqRemove(contour,0); //删除宽高比例小于设定值的轮廓
continue;
}
CvScalar color = CV_RGB( 255, 0, 0);
cvDrawContours(frame_draw, contour, color, color, 0, 1, 8 );//绘制外部和内部的轮廓
}
cvNamedWindow("轮廓", 1);
cvShowImage("轮廓", frame_draw);
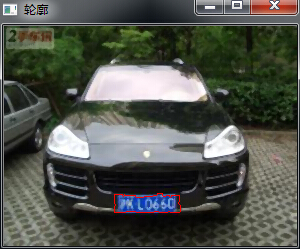
下面就是要字符分割与辨认了吧。
生活不易,码农辛苦
如果您觉得本网站对您的学习有所帮助,可以手机扫描二维码进行捐赠


